Overview
Creating a new workspace in Elai just got easier. You can now selectively copy resources, such as Brand Kits, Templates, Media files, Phonemes, Avatars, Voices, and Team members, from an existing workspace during the setup process.
This provides a faster and more consistent way to set up new workspaces while giving users full control over which resources are transferred. The selected content is automatically copied during workspace creation, reducing manual setup and helping teams get started more quickly.
Prerequisites
- Enterprise plan
- Verified organization admin account. See How to Verify Your Elai Account for more detailed steps
Copying Configurations During Workspace Creation
To copy a workspace's settings, you first need to start creating it. You can initiate the workspace creation process in two ways: from the Workspace dropdown in the upper-left corner of the screen, or from the Workspaces section in Organization Settings. After that, follow these steps to copy the workspace settings:
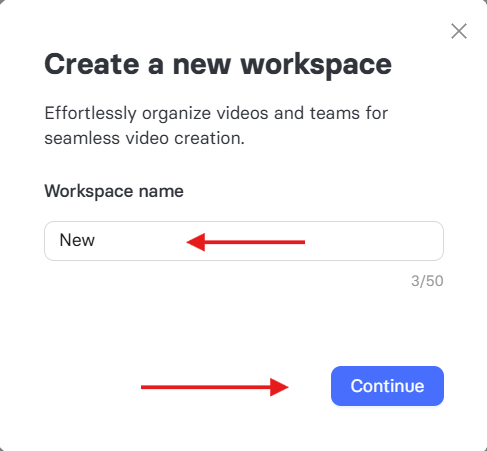
- In the Create a new workspace dialog, enter a name for your workspace in the Workspace name field.
- Select Continue.
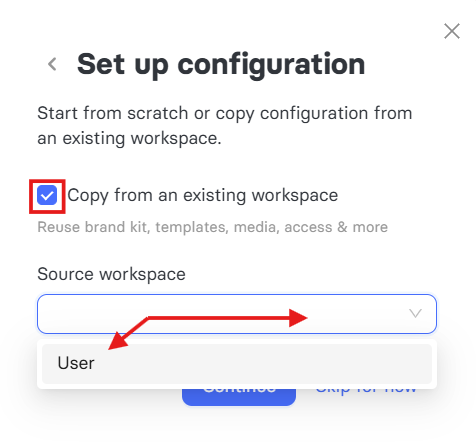
- You'll be directed to the Set up configuration screen. Check the Copy from an existing workspace box.
- From the Source workspace dropdown menu, select the existing workspace you want to copy resources from.
- A list of available resources appears. Check the boxes next to the items you want to transfer to the new workspace. You can choose to copy:
- Brand kit
- Templates
- Media files
- Phonemes
- Avatars
- Voices
- Users (Team members)
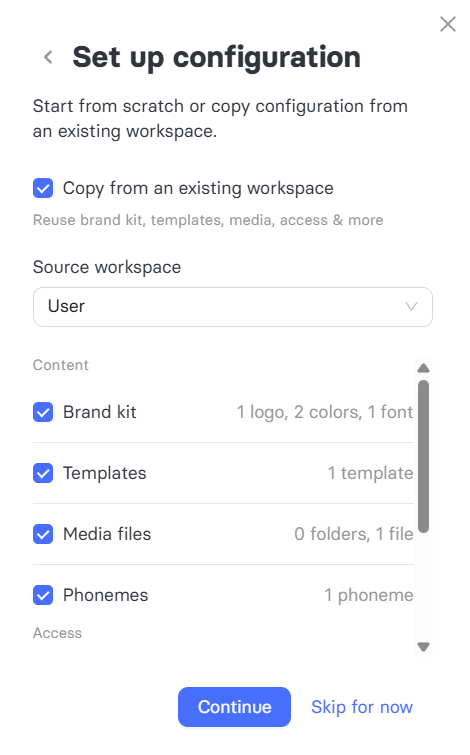
- Once you've made your selections, click Continue. If you don't want to copy any configurations, select Skip for now instead.
- In the Add team members step, you can optionally enter your collaborators' email addresses and assign a role to each one. If you don't want to invite other users yet, select Skip for now.
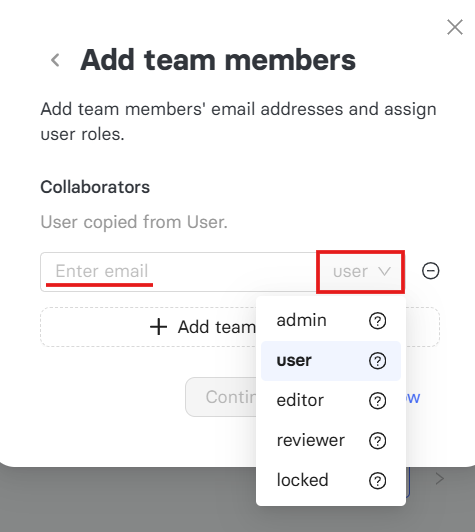
- Click Continue. You'll receive a confirmation that the workspace was created successfully, and your selected configurations will automatically appear in the new workspace.
FAQ
What plan do I need to copy workspace configurations?
This feature is available on the Enterprise plan.
Who can copy configurations when creating a new workspace?
You need a verified organization admin account.
Which resources can I copy from an existing workspace?
You can choose to copy Brand Kit, Templates, Media files, Phonemes, Avatars, Voices, and Users (Team members).
What happens if I don't want to copy any configurations?
Select Skip for now on the Set up configuration screen to continue creating the workspace without copying any resources.
Can I skip adding team members during setup?
Yes. On the Add team members step, select Skip for now if you don't want to invite collaborators at that time.
Was this article helpful?
That’s Great!
Thank you for your feedback
Sorry! We couldn't be helpful
Thank you for your feedback
Feedback sent
We appreciate your effort and will try to fix the article